🔎 Backtest Strategy
Overview
Backtest Strategy turns a detected setup into a simulated trade and manages it with either a fixed Risk/Reward exit or a Trailing Stop-Loss, both strategy has to anchored the stop-loss to a specific percentage scale (Trend%Scale or a candle’s % scale).
You can choose the order side, the management method, the % scale source, and the SL/TP levels— then the strategy runs the historical execution logic accordingly.
Trend%Scale is available only when Trend Direction is Bullish or Bearish Trend. Otherwise, pick a candle’s First/Second%Scale.
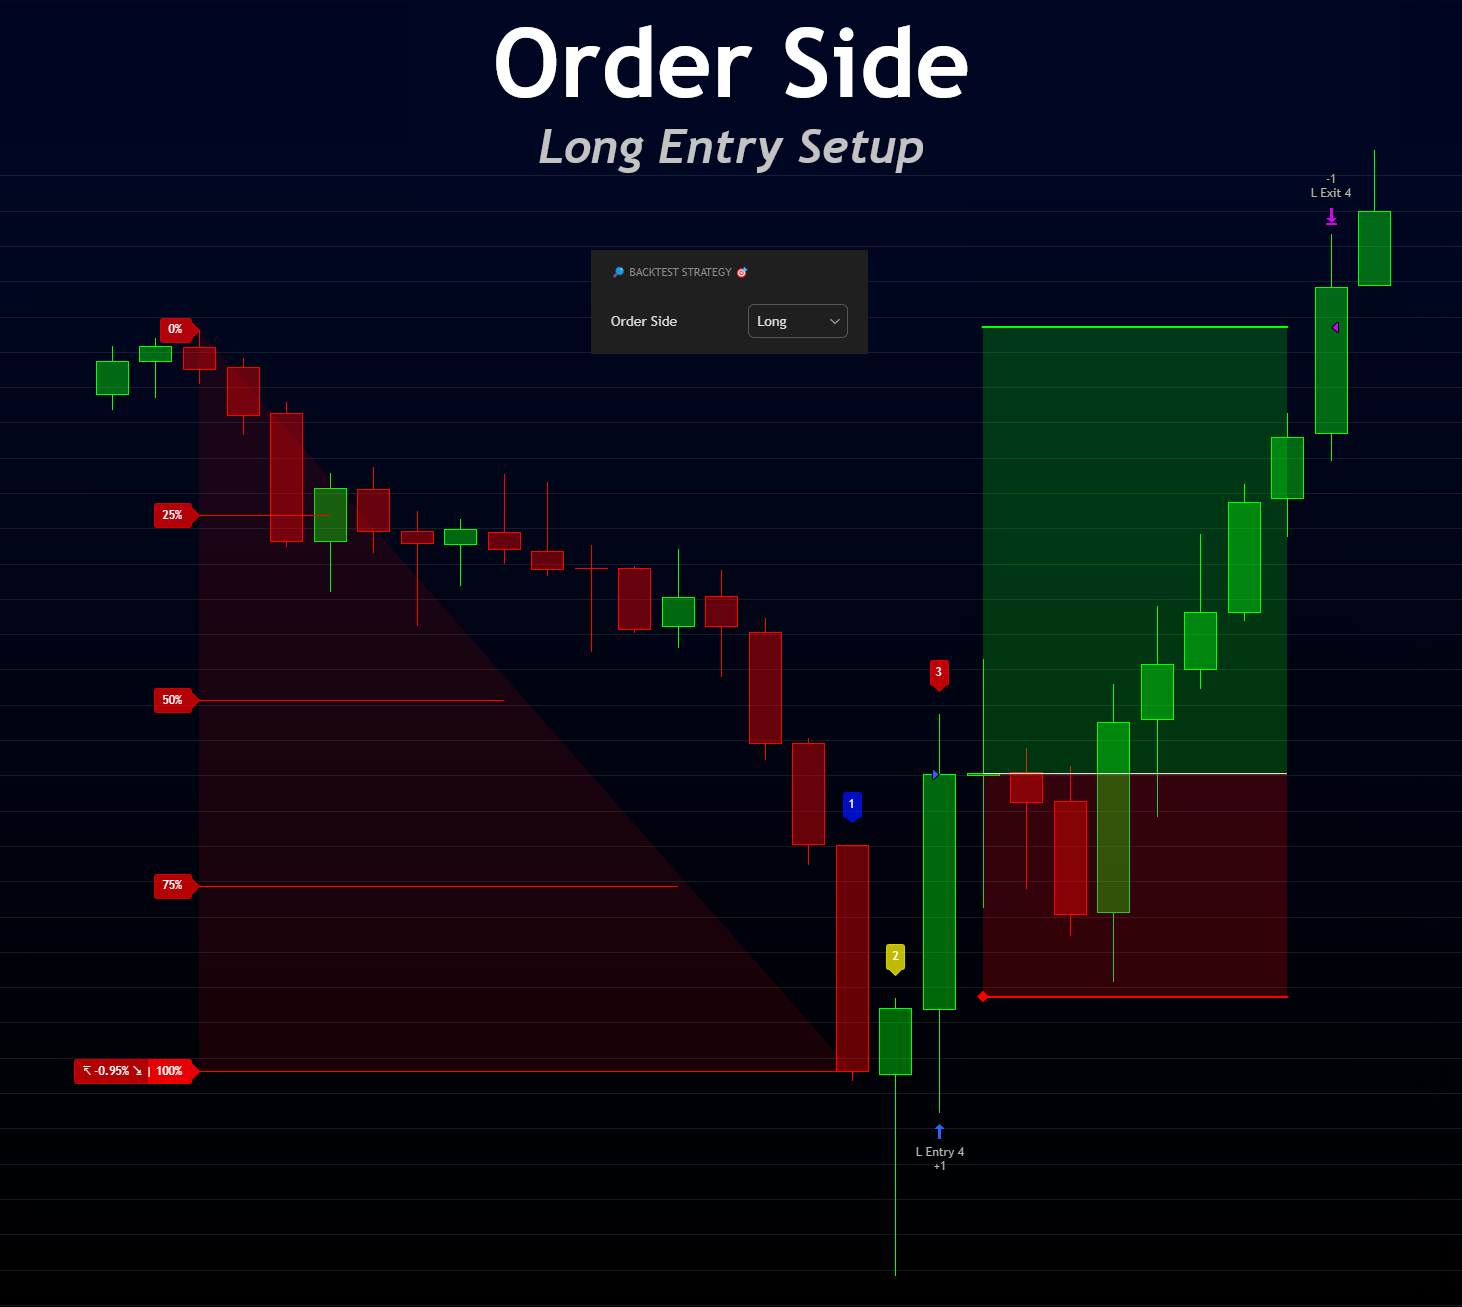
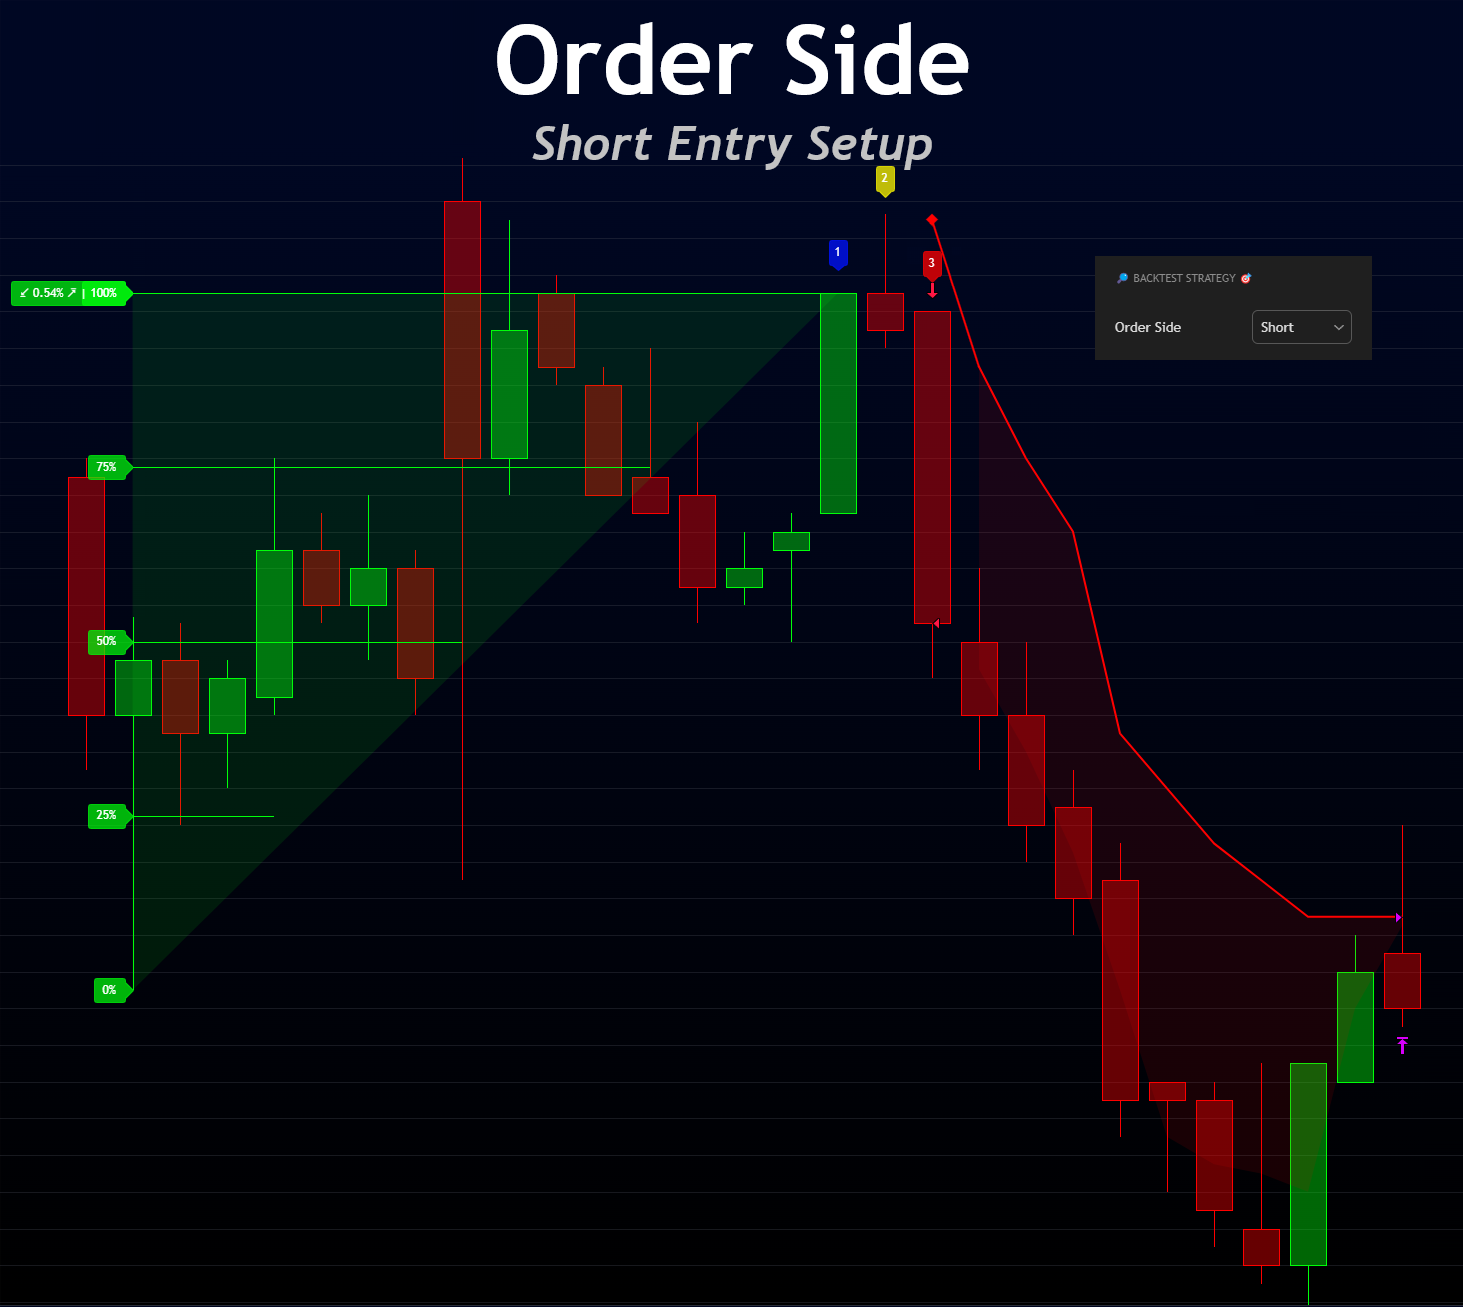
Order Side
Choose the direction of the simulated order your pattern will trigger.
- Long → Buy/Long entry at the last candlestick of the detected pattern closes.
- Short → Sell/short entry at the last candlestick of the detected pattern closes.
Examples
Keep the order side aligned with your Trend Direction and pattern logic to avoid contradictory backtests
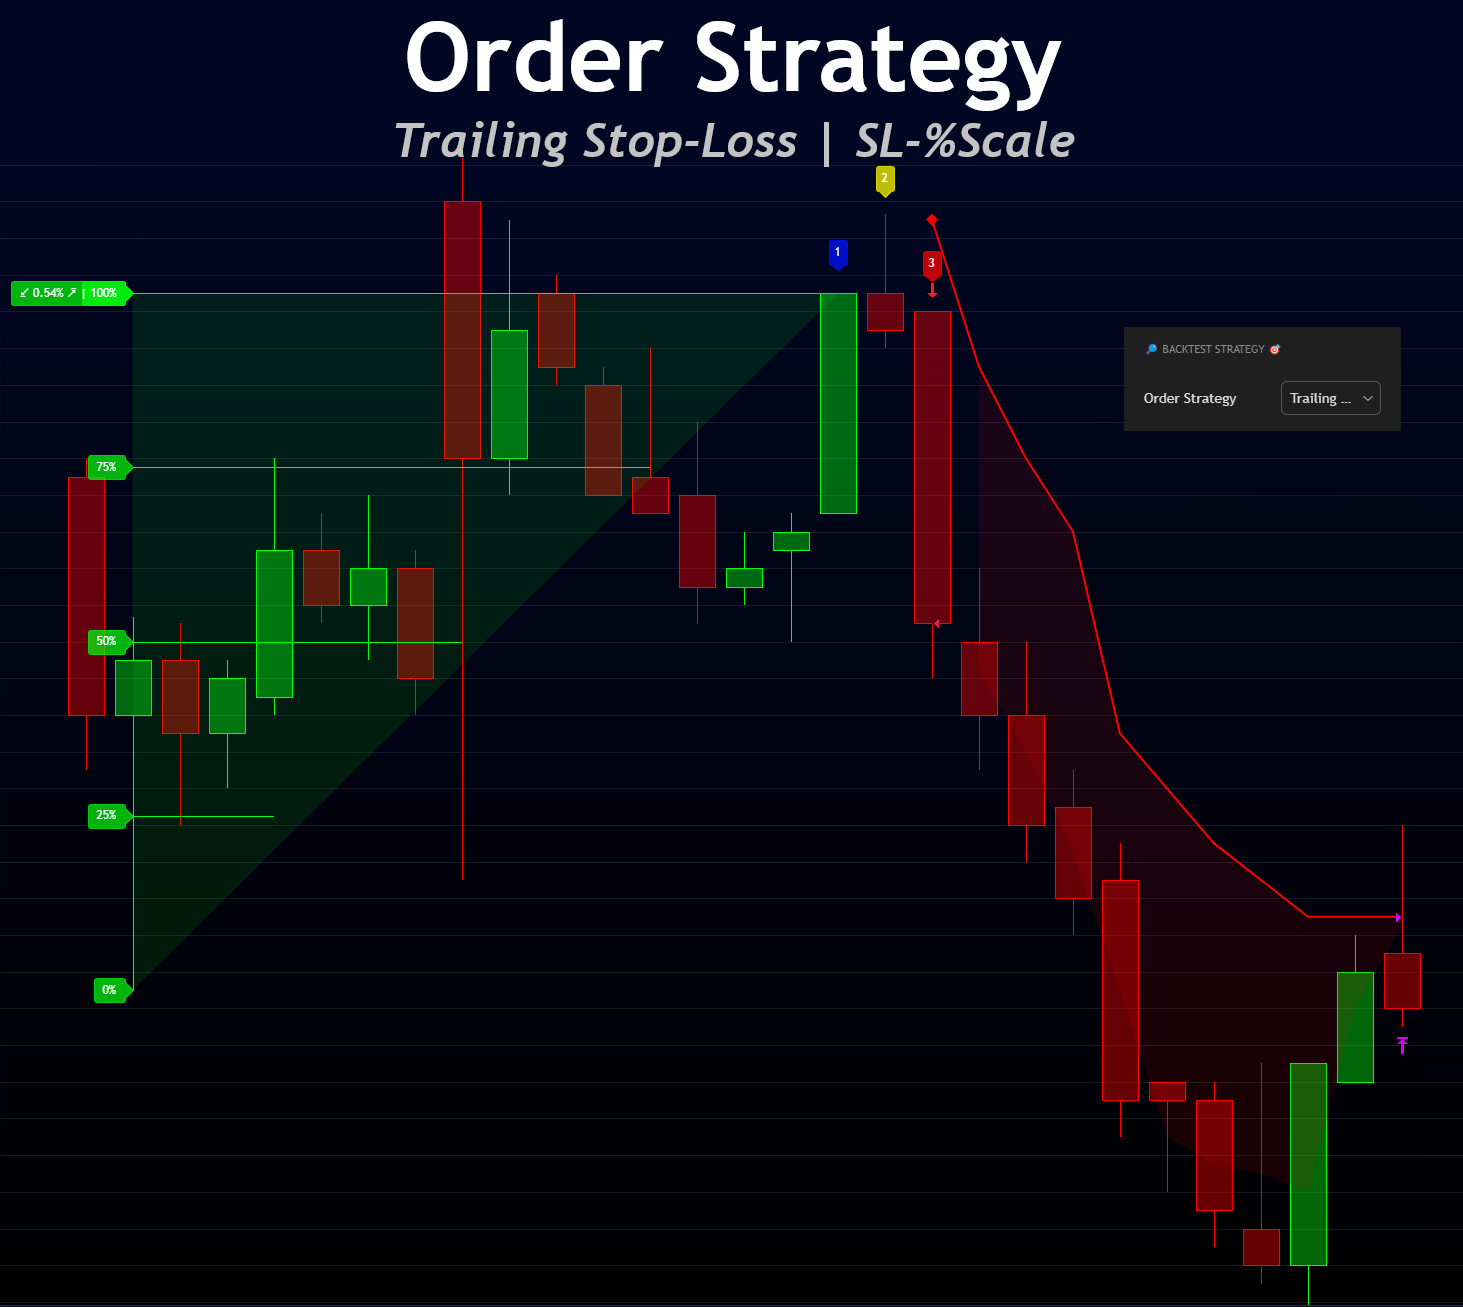
Order Strategy
Pick the exit management model:
1) Risk Reward Ratio | SL-%Scale
Set a fixed stop and a fixed take-profit relative to entry.
- Stop-Loss: placed at SL-%Scale Level on the chosen %Scale Filter.
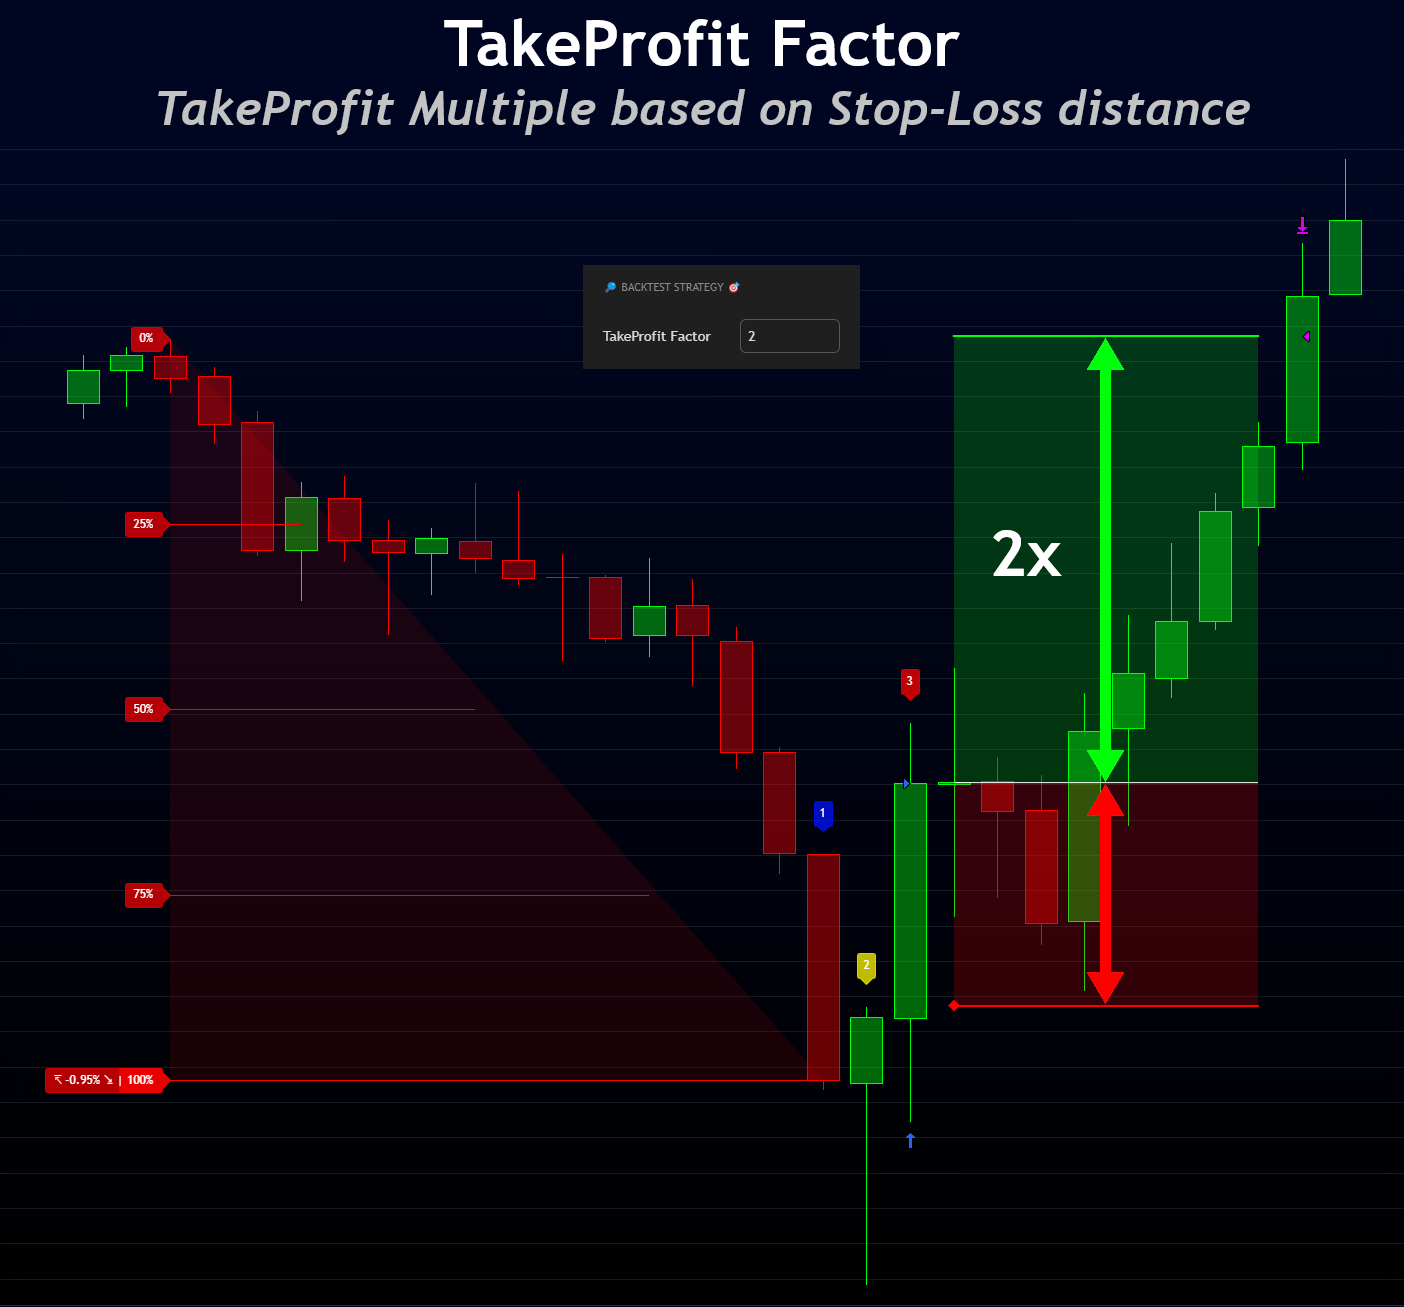
- Take-Profit: computed by RR factor × distance(entry ↔ stop).
2) Trailing Stop-Loss | SL-%Scale
A dynamic stop that follows price as it moves in your favor.
- Initial SL is placed at SL-%Scale Level (on the chosen %scale).
- As price advances, the stop trails according to the script’s trailing logic tied to that level/scale.
Examples
Both methods use the same SL anchor (your chosen %Scale Filter + SL-%Scale Level).
Take-Profit Factor is used only with Risk Reward Ratio.
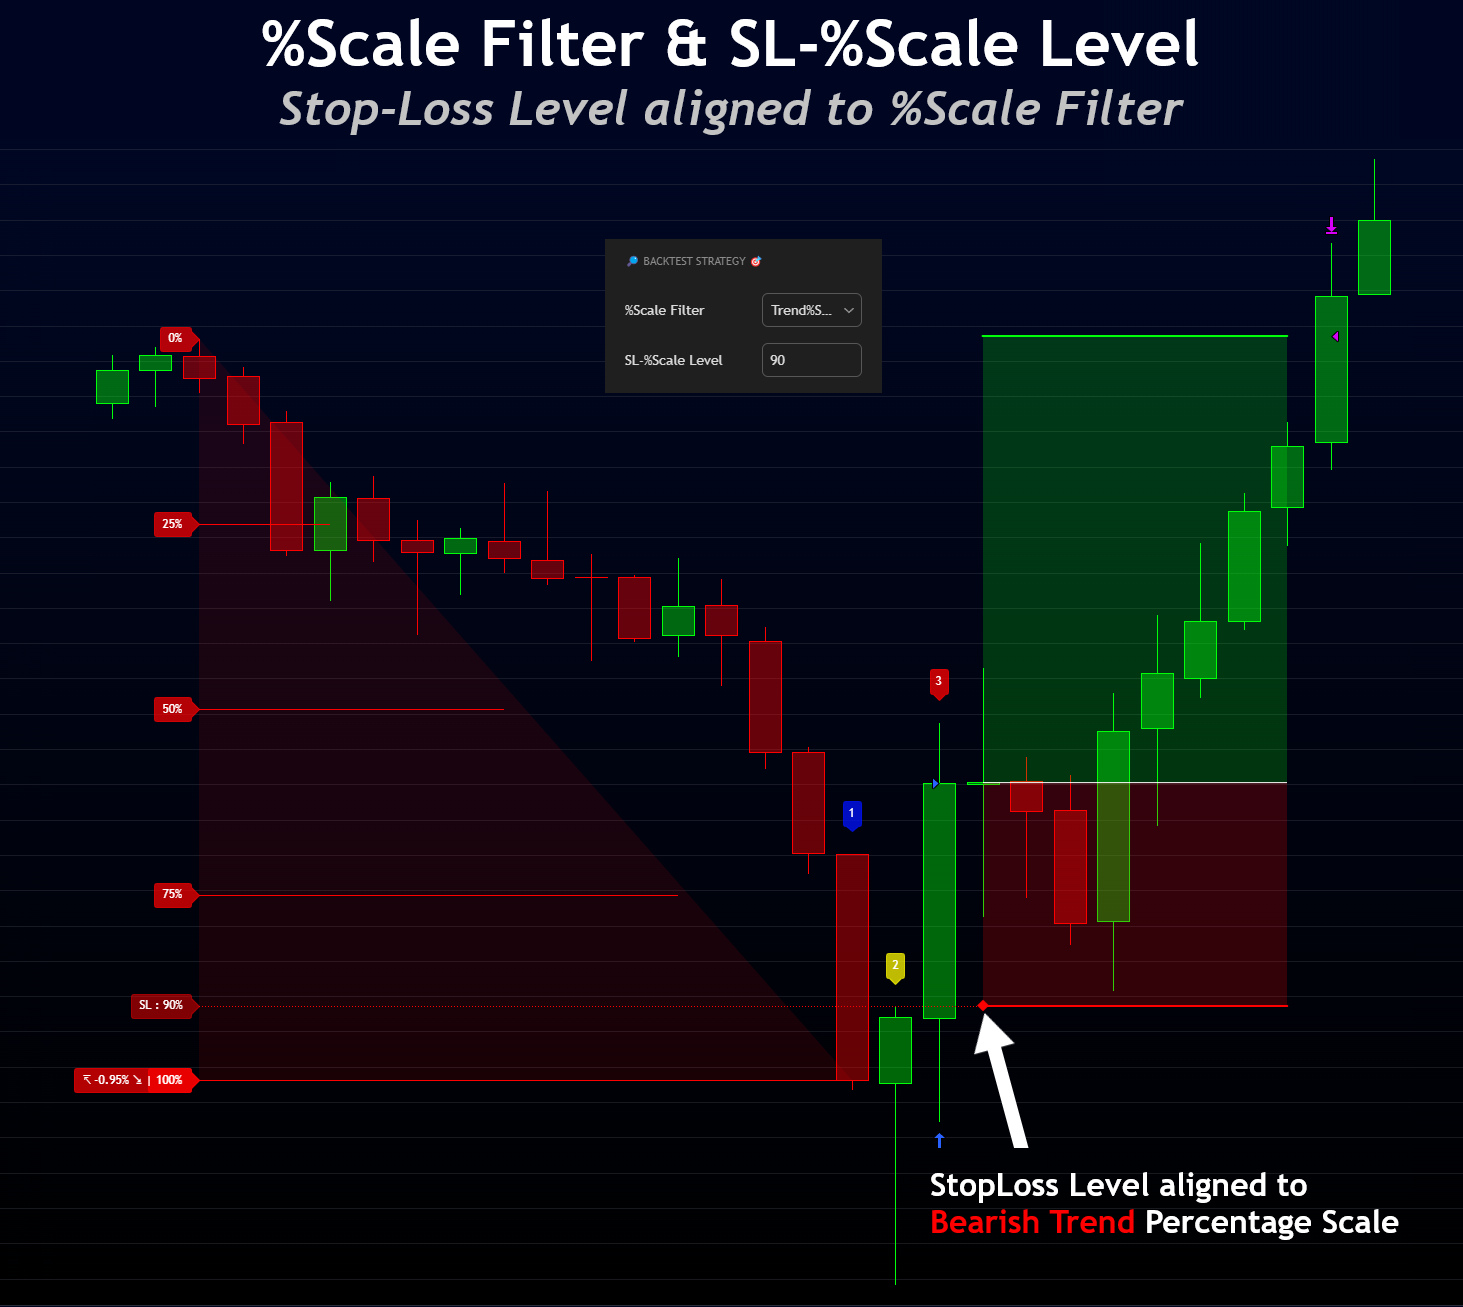
%Scale Filter & SL-%Scale Level
Select which percentage scale your Stop-Loss uses as reference to position his level on %Scale Filter setting.
Then, set the percentage level (SL-%Scale Level) on the selected percentage scale on %Scale Filter where the Stop-Loss is positionned.
Percentage Scale Choice:
- Trend%Scale
- First%Scale #1 / Second%Scale #1
- First%Scale #2 / Second%Scale #2
- First%Scale #3 / Second%Scale #3
- First%Scale #4
Use Trend%Scale to anchor stop-loss level to the pre-trend structure, or choose a candle’s First/Second%Scale.
Examples
Trend%Scale is available only if Trend Direction is Bullish or Bearish Trend. Otherwise, pick a First/Second%Scale from one of your pattern candles.
Take-Profit Factor
Sets the profit target as a multiple of the entry–stop distance.
(Used only with Risk Reward Ratio | SL-%Scale)
Example
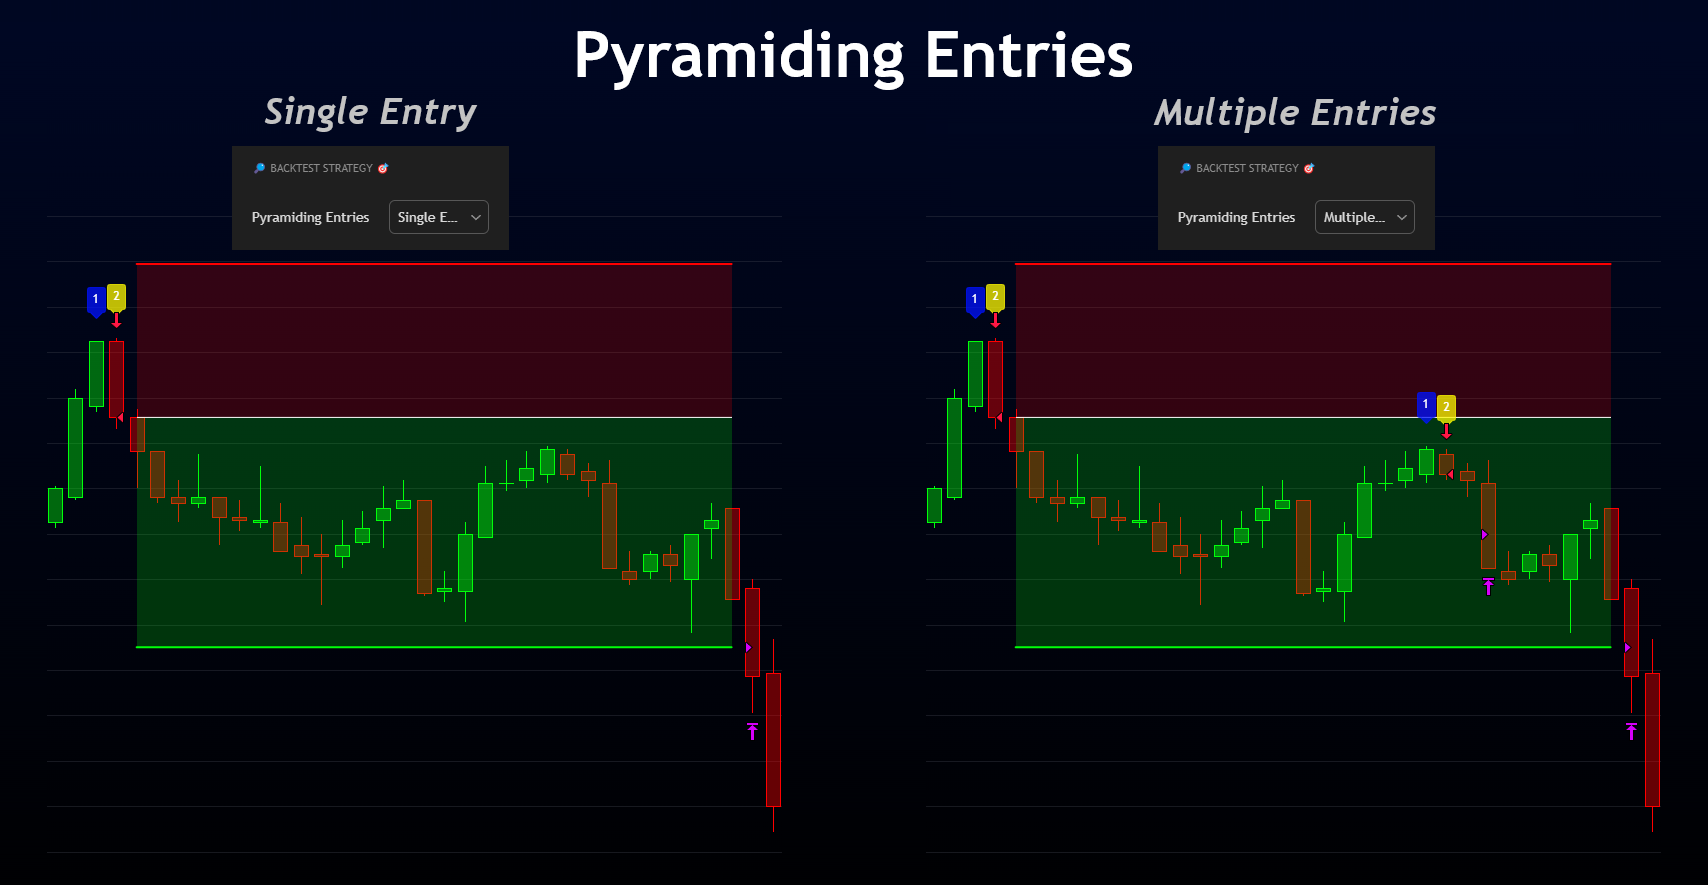
Pyramiding Entries
Controls whether the strategy can open multiple trades concurrently.
- Single Entry → Only one position open at a time.
- Multiple Entries → New setups can open trades even if one is already active.
Example
If you choose Multiple Entries, increase the “pyramiding” value in TradingView’s Strategy Properties.
For clarity, drawings related to Trailing Stop and Risk/Reward are auto-disabled in Multiple Entries mode; each entry/exit is still labeled with a unique ID (e.g., Long Entry 3850 / Long Exit 3850).
